
5 ways to draw interesting shapes: Form and Construction (Part 2 | Art Journal #10)
Level up your boring shapes with these 5 Techniques! Tips and techniques to draw 3D shapes.

Hey there!
Welcome to the 10th episode of the Art Journal series!
In this newsletter series, you get to see my recent drawings, the process of creating a digital illustration, art tutorials, and some tips as well.
The previous episode:

In Part 1, we covered ‘Form’ from one of the art fundamentals: ‘Form and Construction’.
Today, we will learn how to draw interesting shapes by modifying the plain ol’ boxes, spheres, and cylinders we saw in the previous episode.
I'm going to introduce you to a few techniques that will help us modify 3D shapes in various ways. These techniques will be a part of ‘Form,’ and they will also serve as a bridge between Form and construction.
I won't go too in-depth in this article, as I plan to create more tutorials on this topic. But also because it'll be easier for beginners to learn these shape-drawing techniques before attempting to draw more complex illustrations.
There will be no assignments in this article, but feel free to try to find similar references and practice copying them.
Without further ado, let's get started!
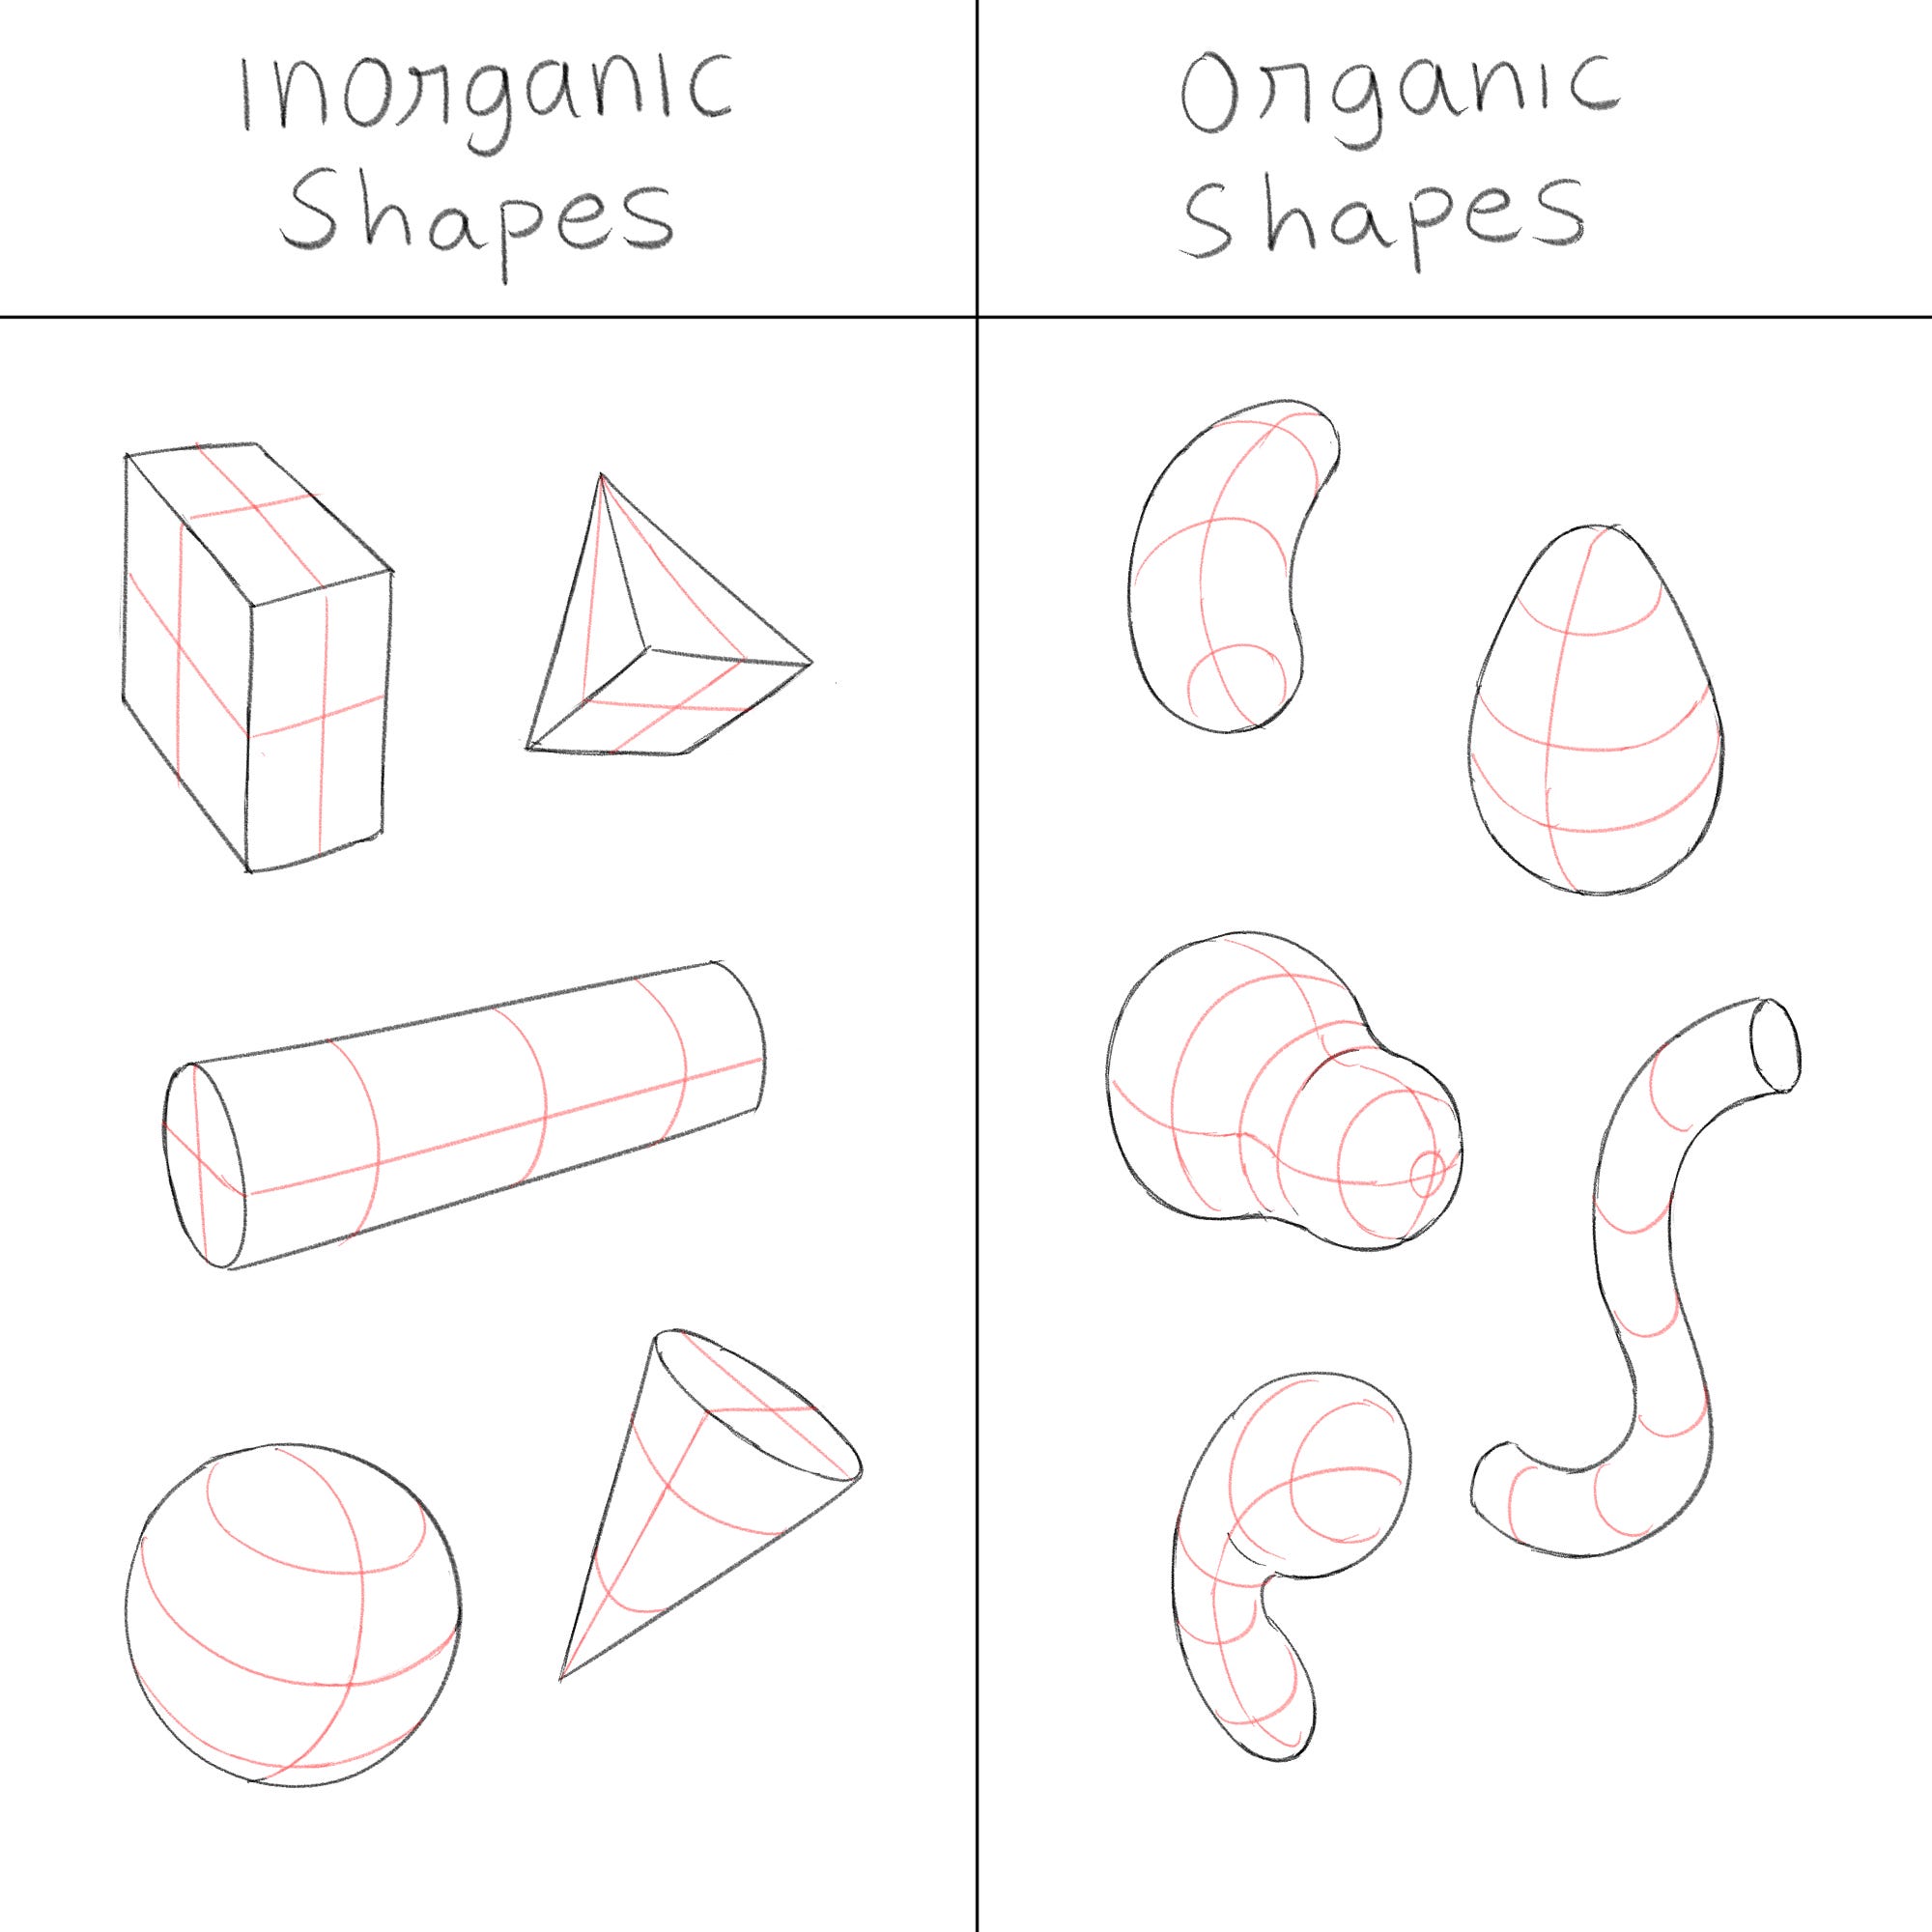
Inorganic shapes and organic shapes
Inorganic shapes mostly feel like man-made objects. They are geometrical, have edges and sides, and they feel like solid materials such as metal and wood. They are predictable, usually symmetrical, and calculated.
Inorganic shapes are unpredictable, flexible, and squishy. They usually feel like materials such as sponges, pillows, and silicone.
A solid-looking shape like a cube can be made of foam, and an organic-looking shape can be made of wood.
So, you don't have to associate a common shape with a particular material. (I only made the connection to make it easier to understand).
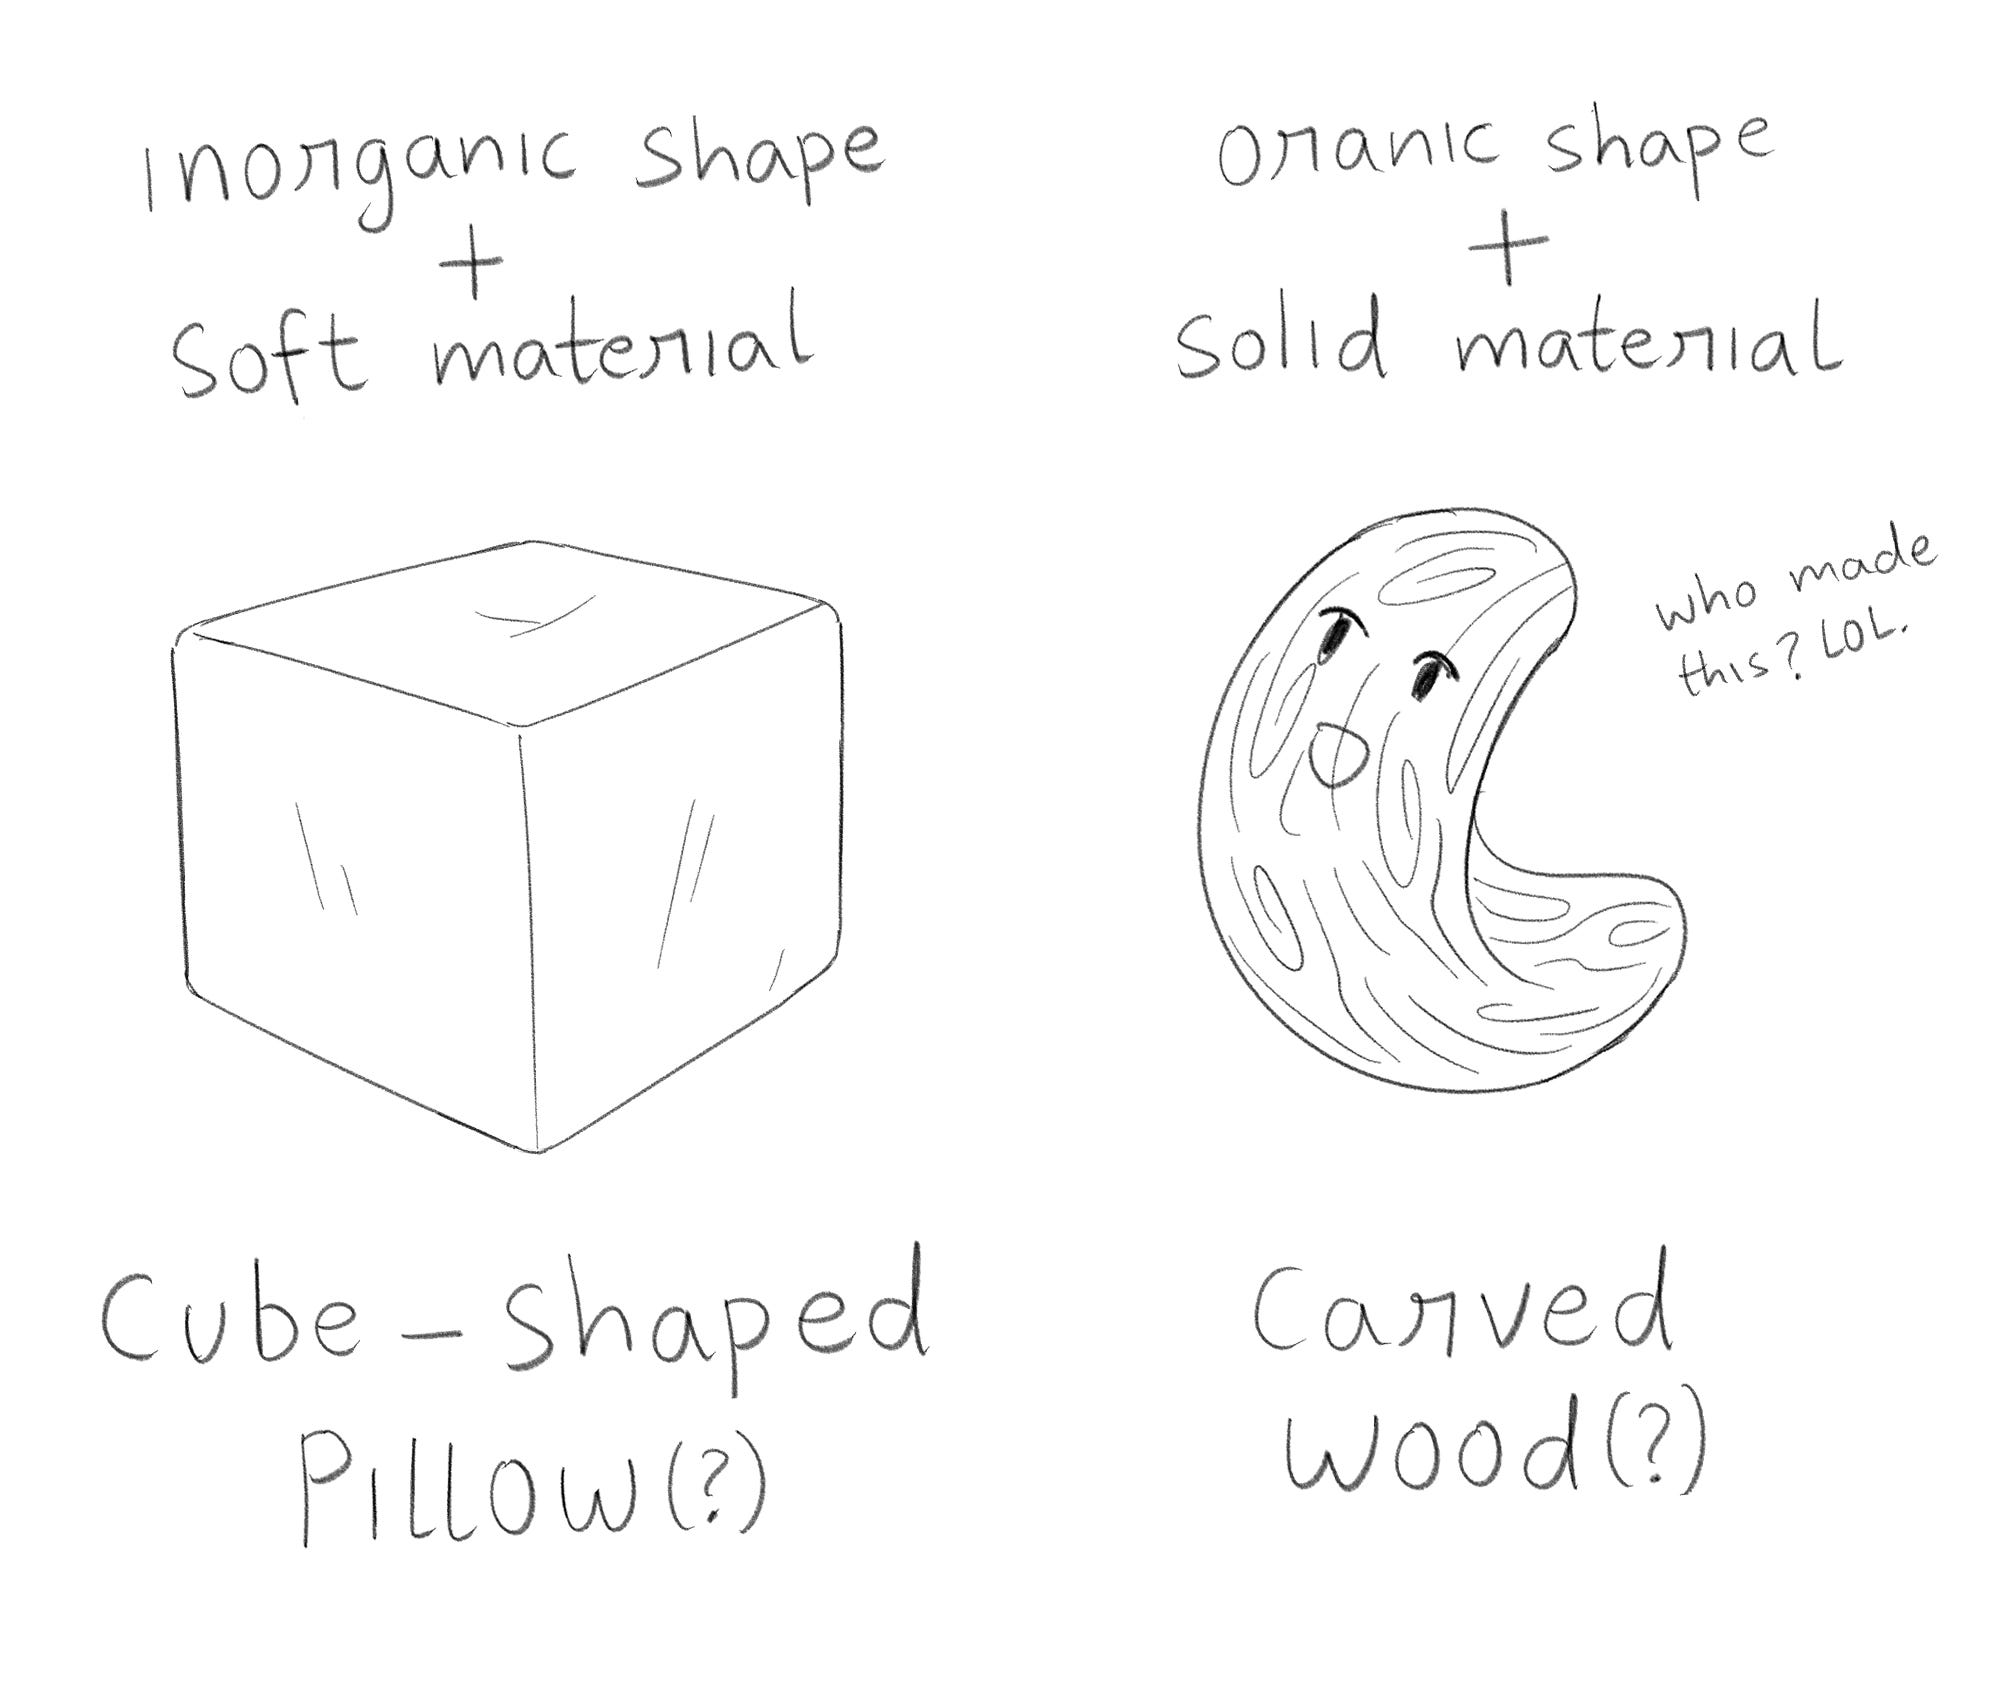
However, sometimes it would be helpful to decide what material the shape you're drawing is made of.
#1: Cutting and carving shapes
This technique can be applied to both organic and inorganic shapes.
Let's start with a box, because it's easier to understand.
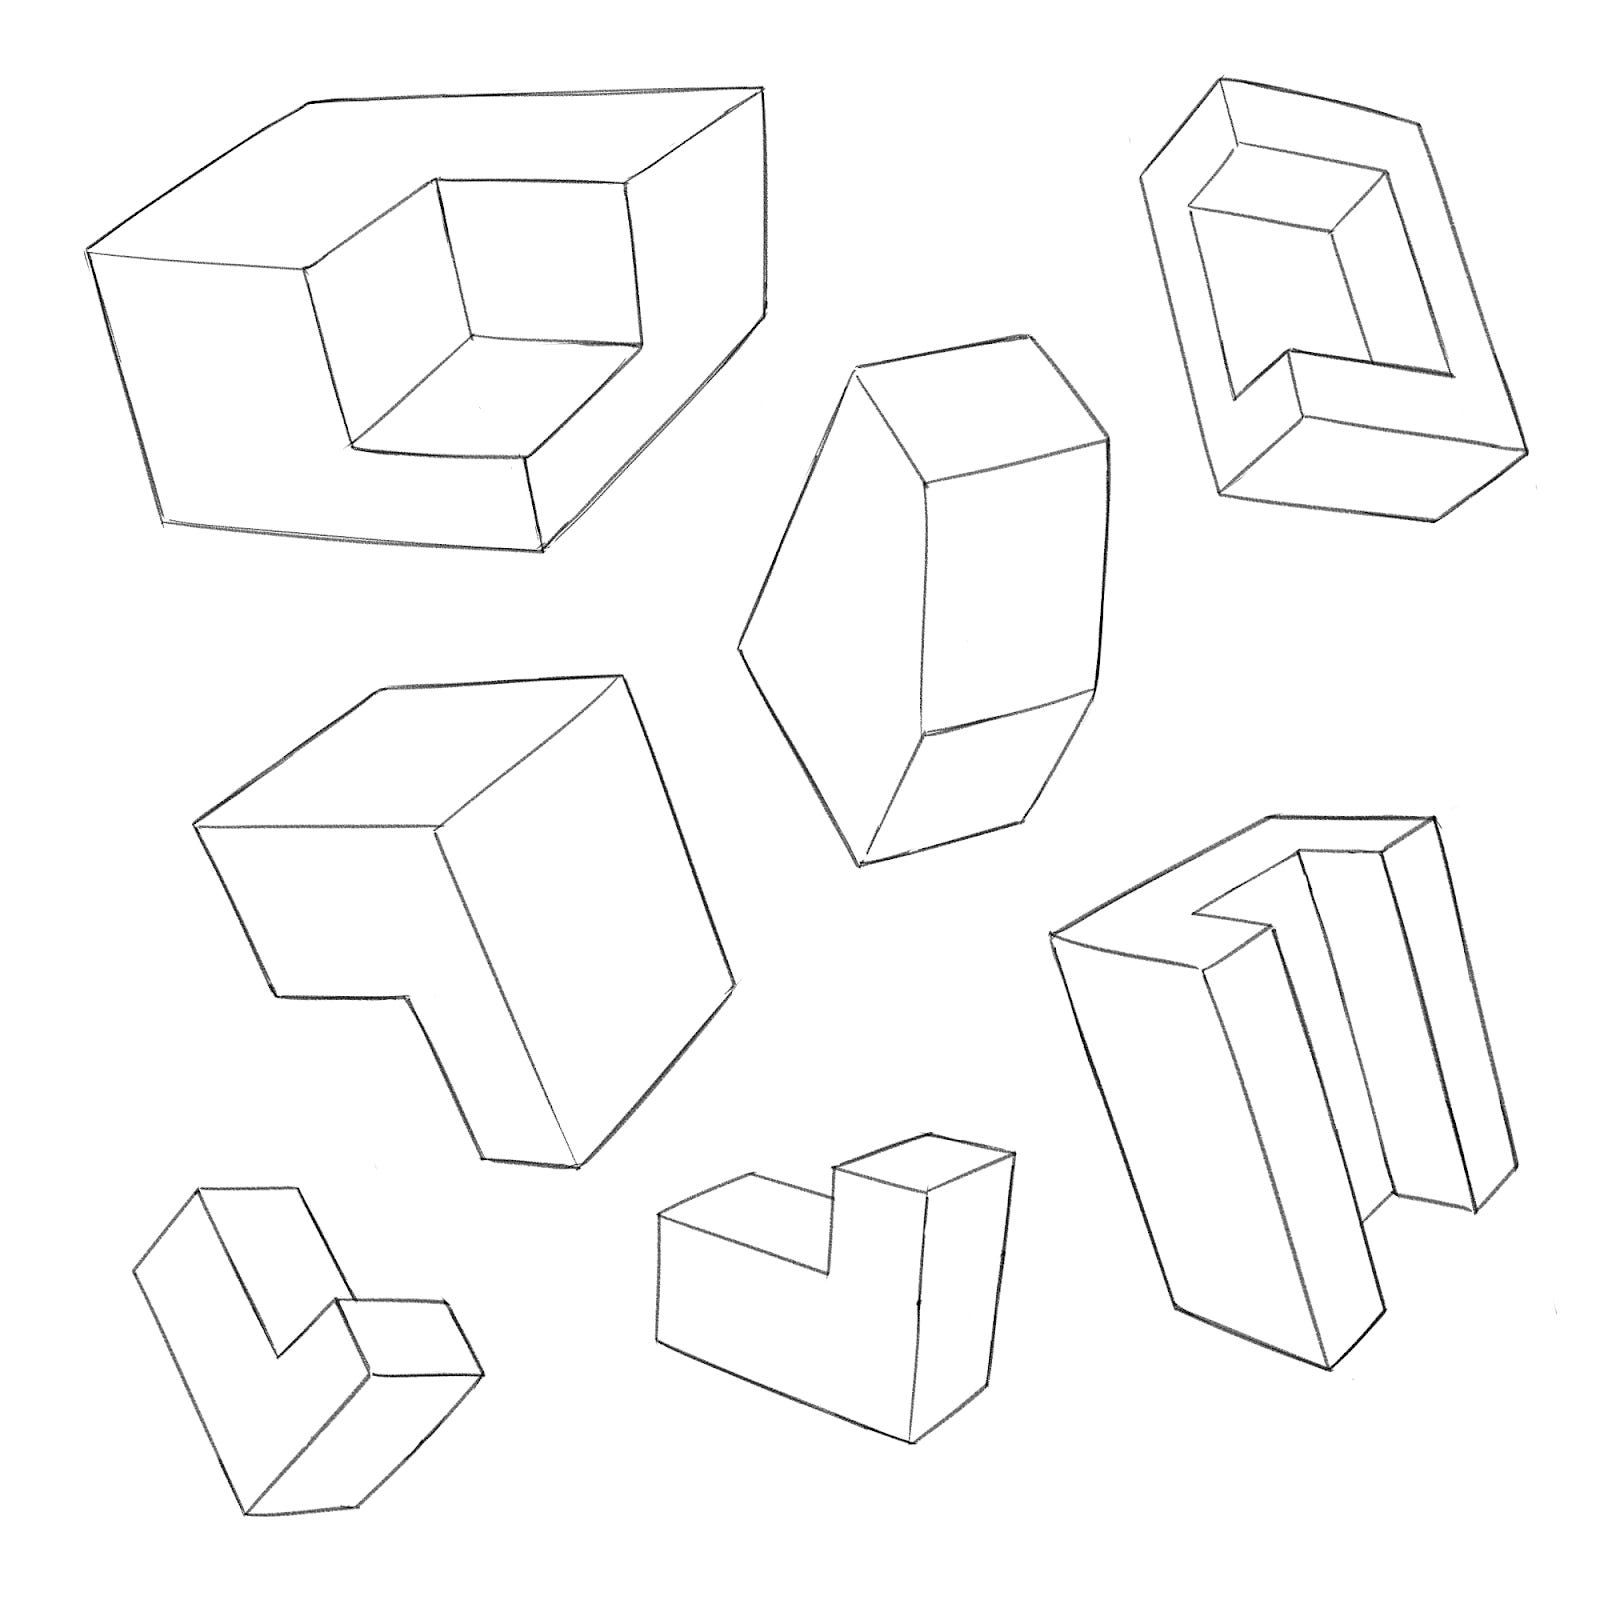
Imagine you have a box, and you want to make something good with it. You have a knife and can cut it into two pieces or you can cut out a small portion of it. You can also carve it however you'd like.
Tip: It's easier to get the shape accurate by drawing the entire box first and then cutting it, instead of trying to draw a cut box from the get-go.
After you get the hang of modifying boxes this way, you can cut and carve other shapes too. However, some of these might be a bit trickier:
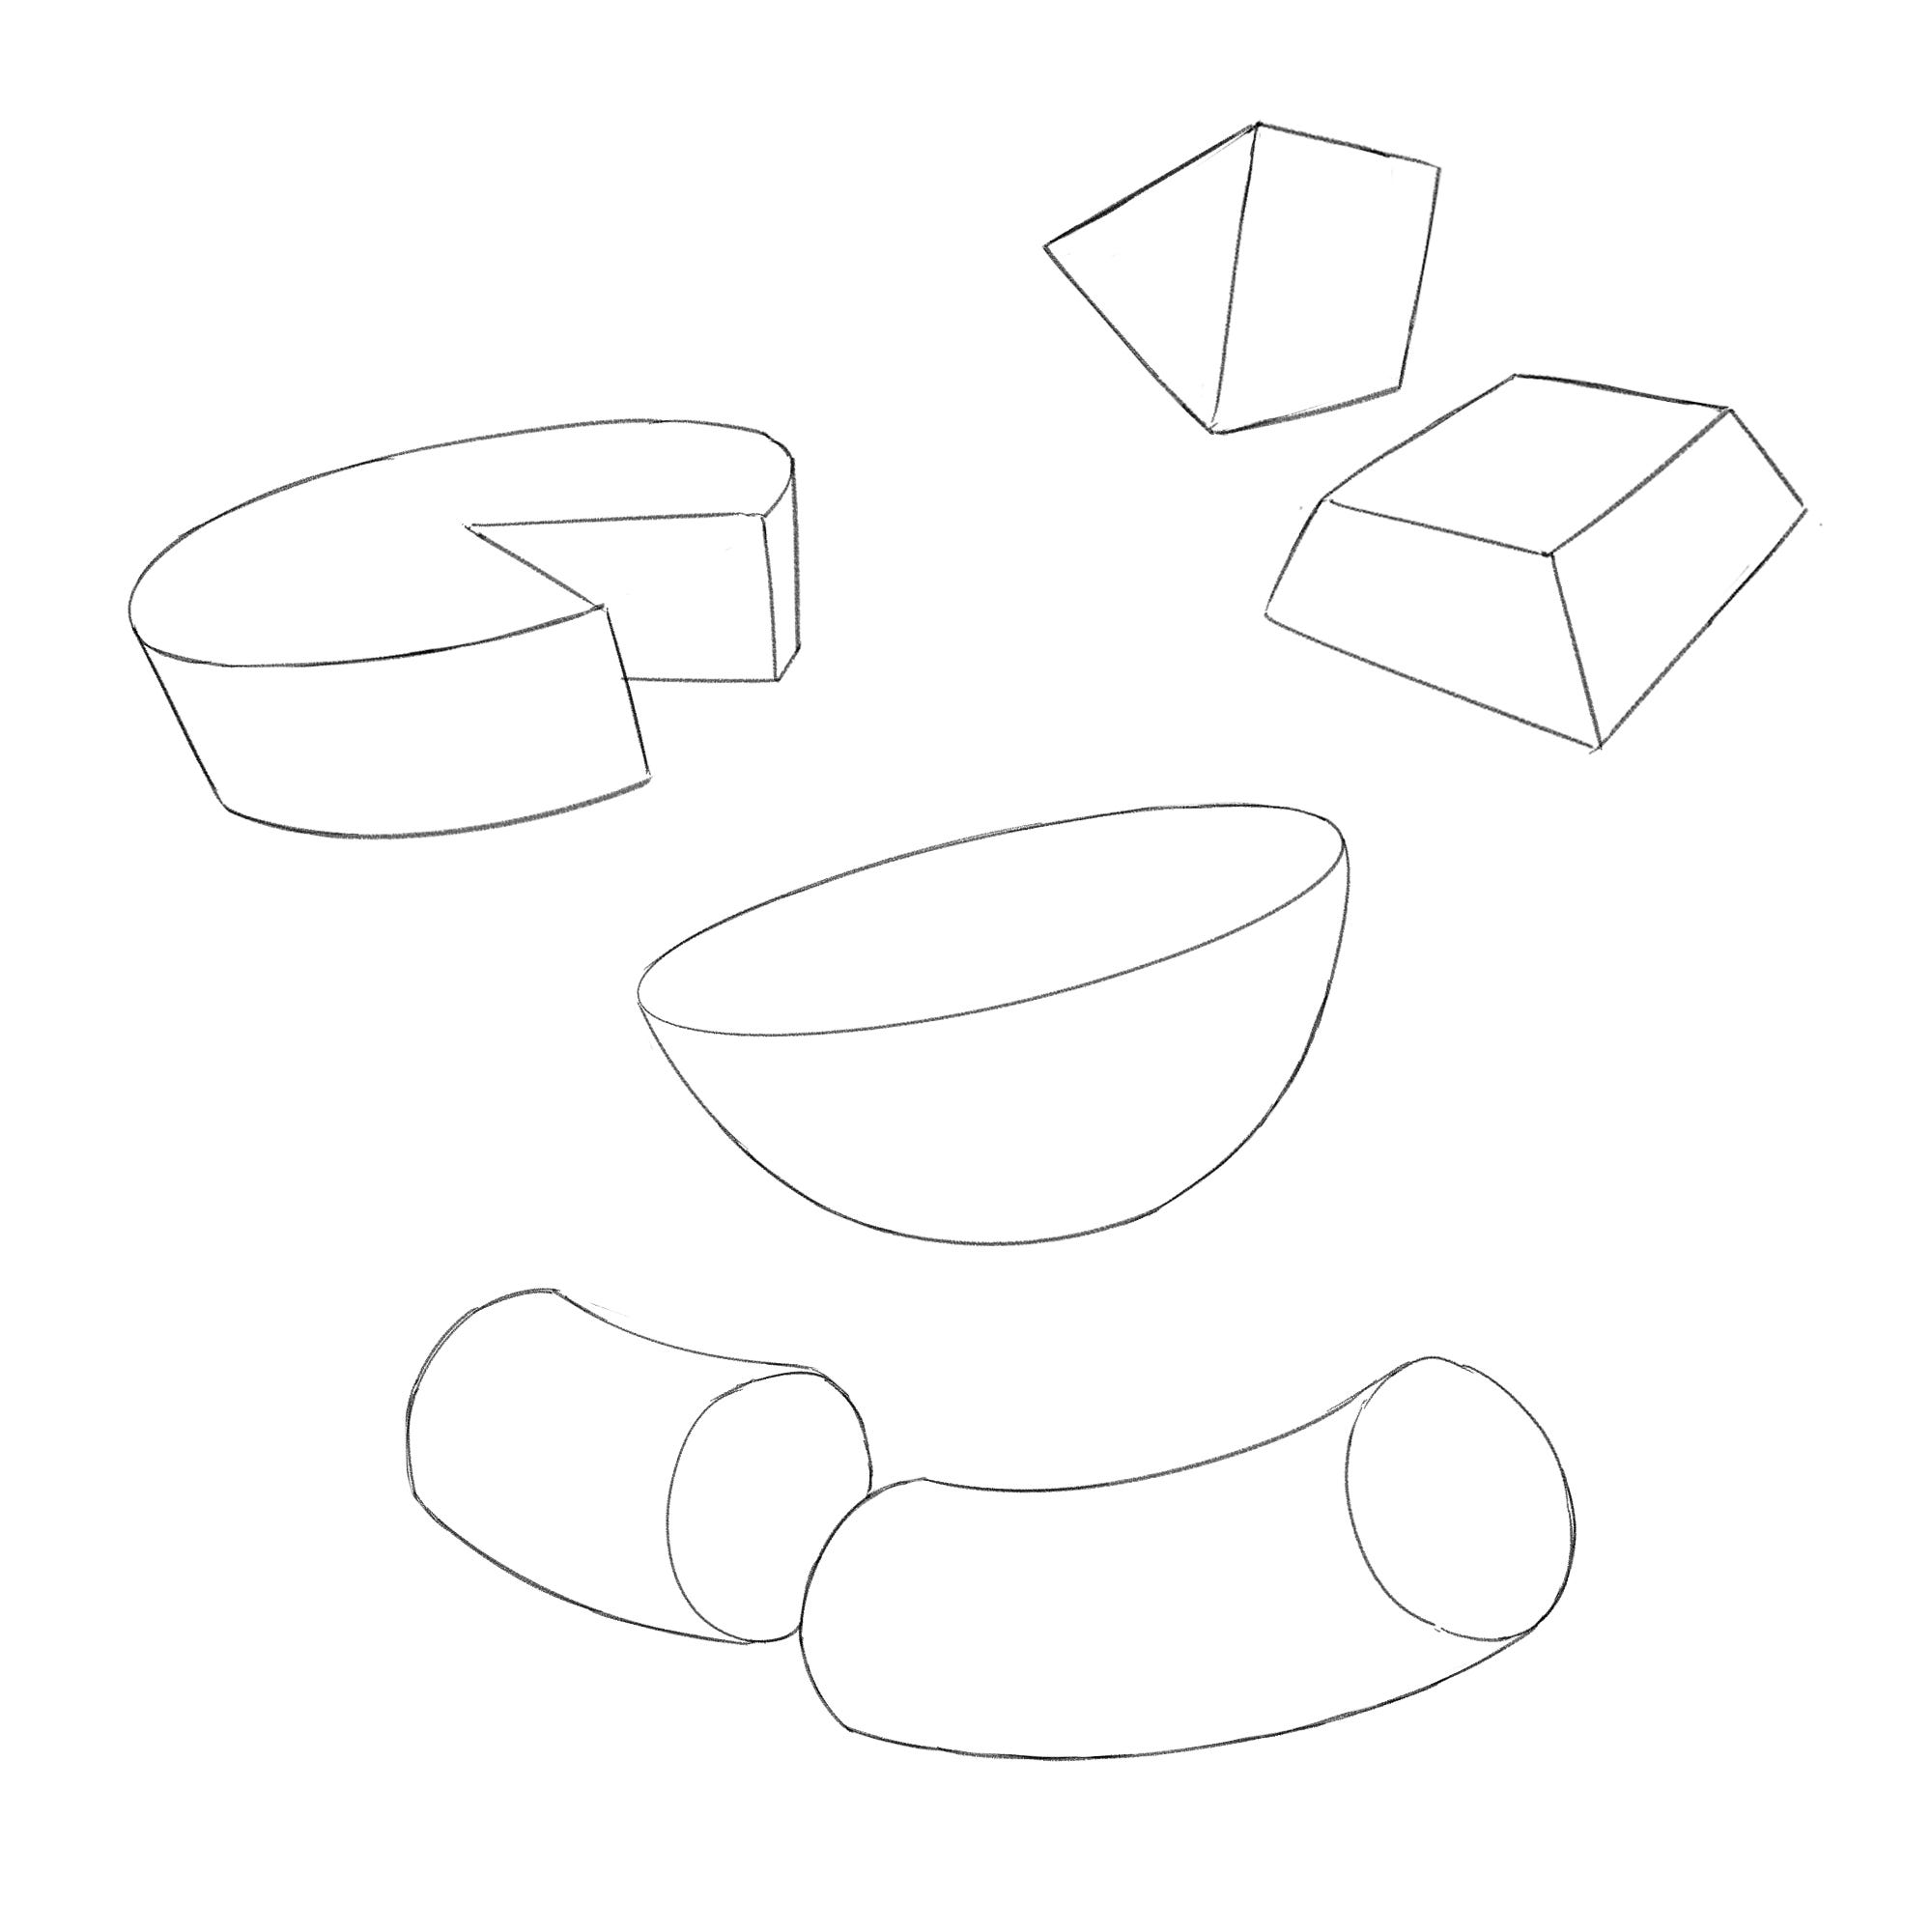
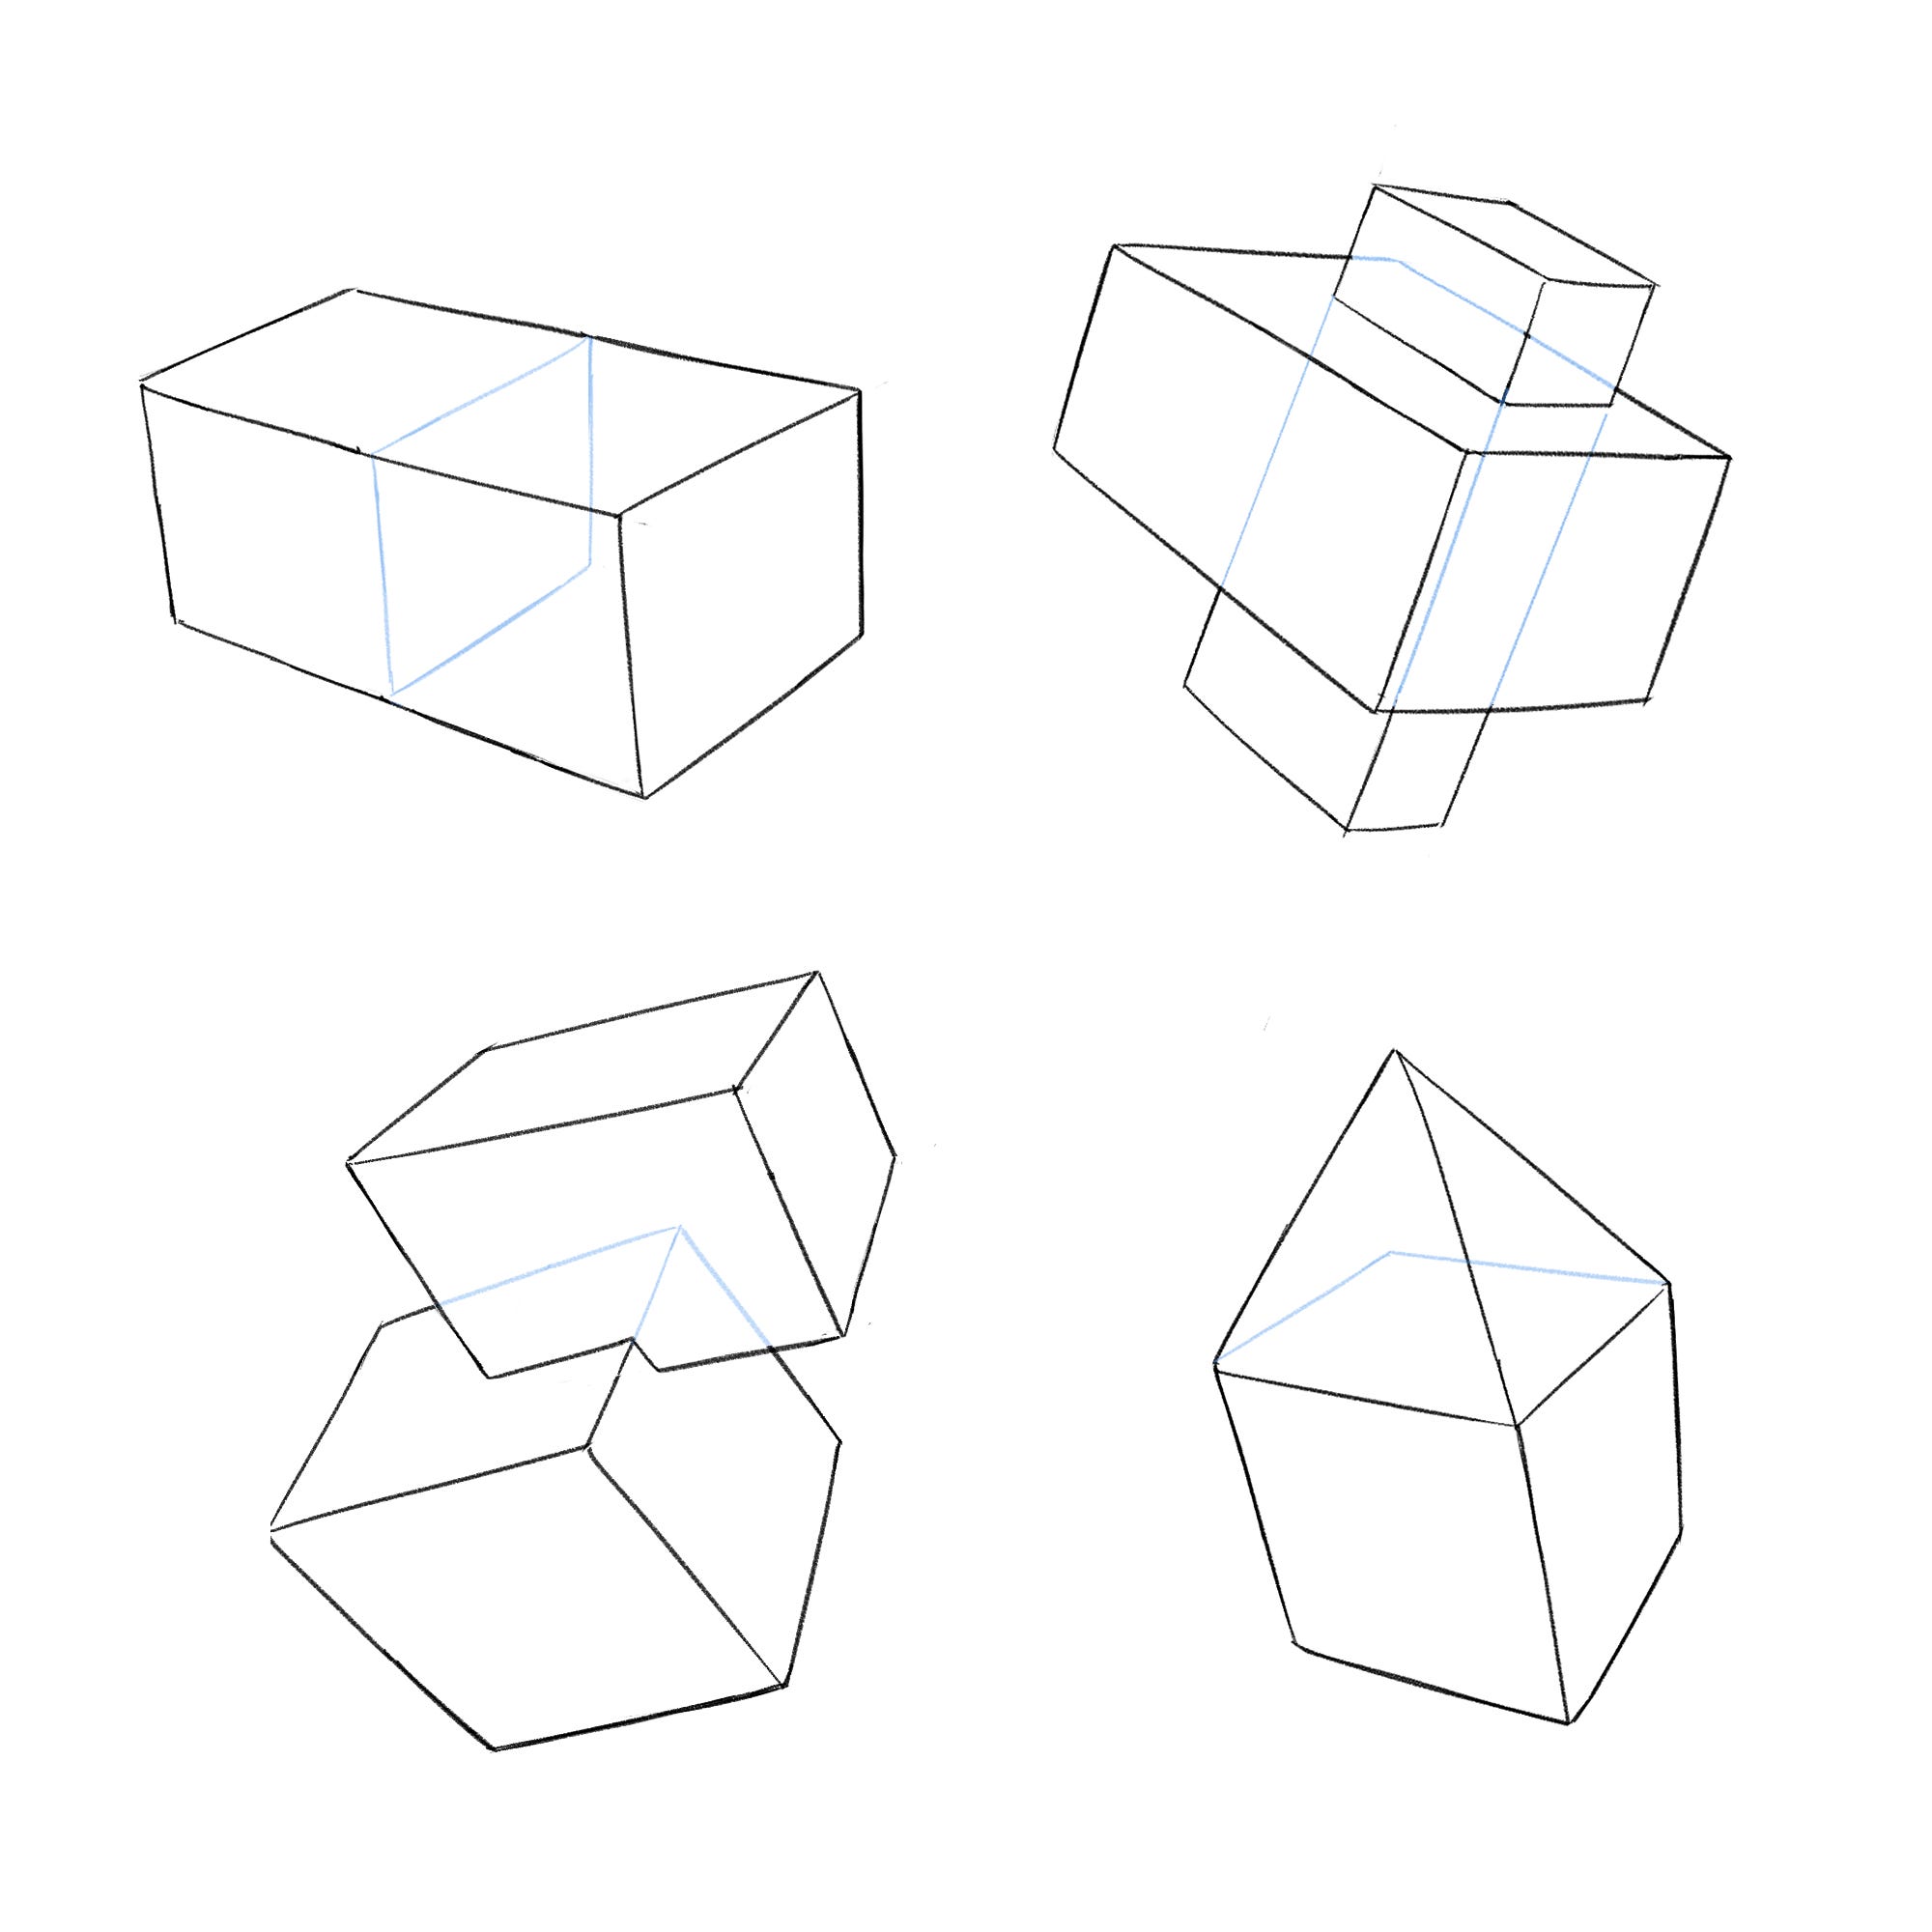
#2: Intruding and extruding shapes
This technique can mostly be applied to geometric shapes like cubes, cuboids, and cylinders.
This one is helpful when you want to adjust the proportions of a box or the height of a cylinder that you drew. Here's how you intrude or extrude a box:
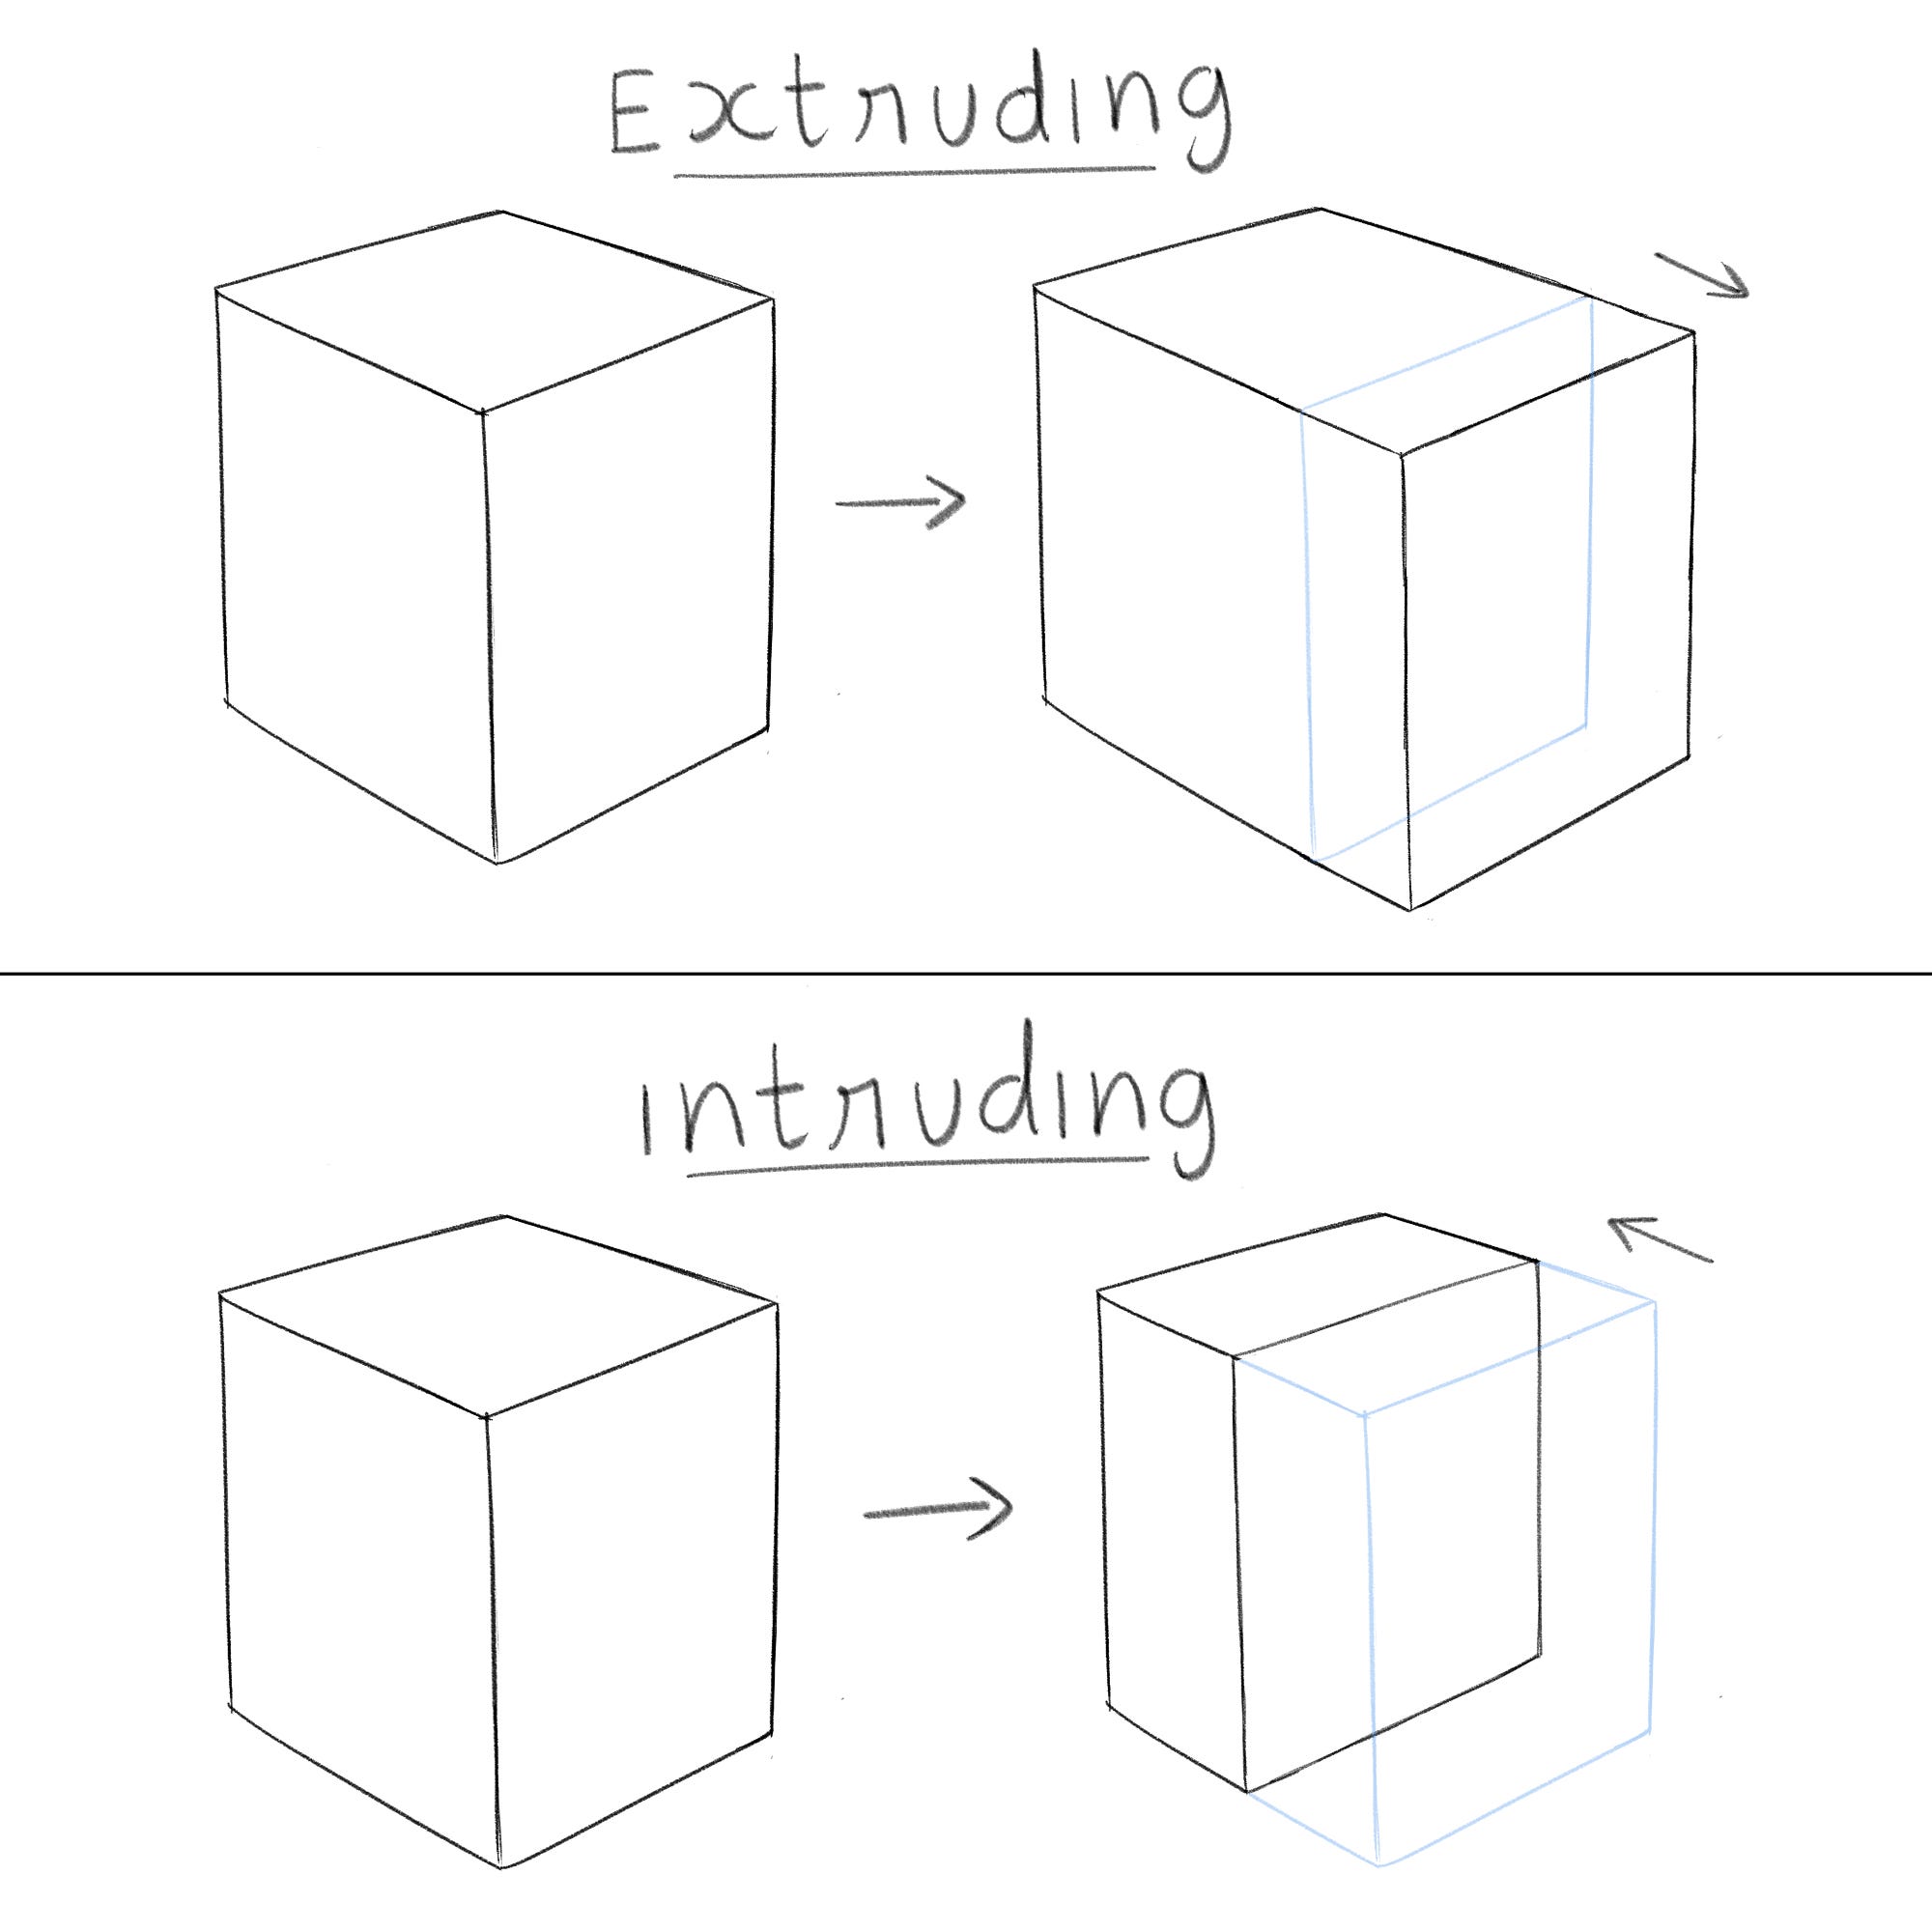
You can also make the box taller or shorter by intruding or extruding it.
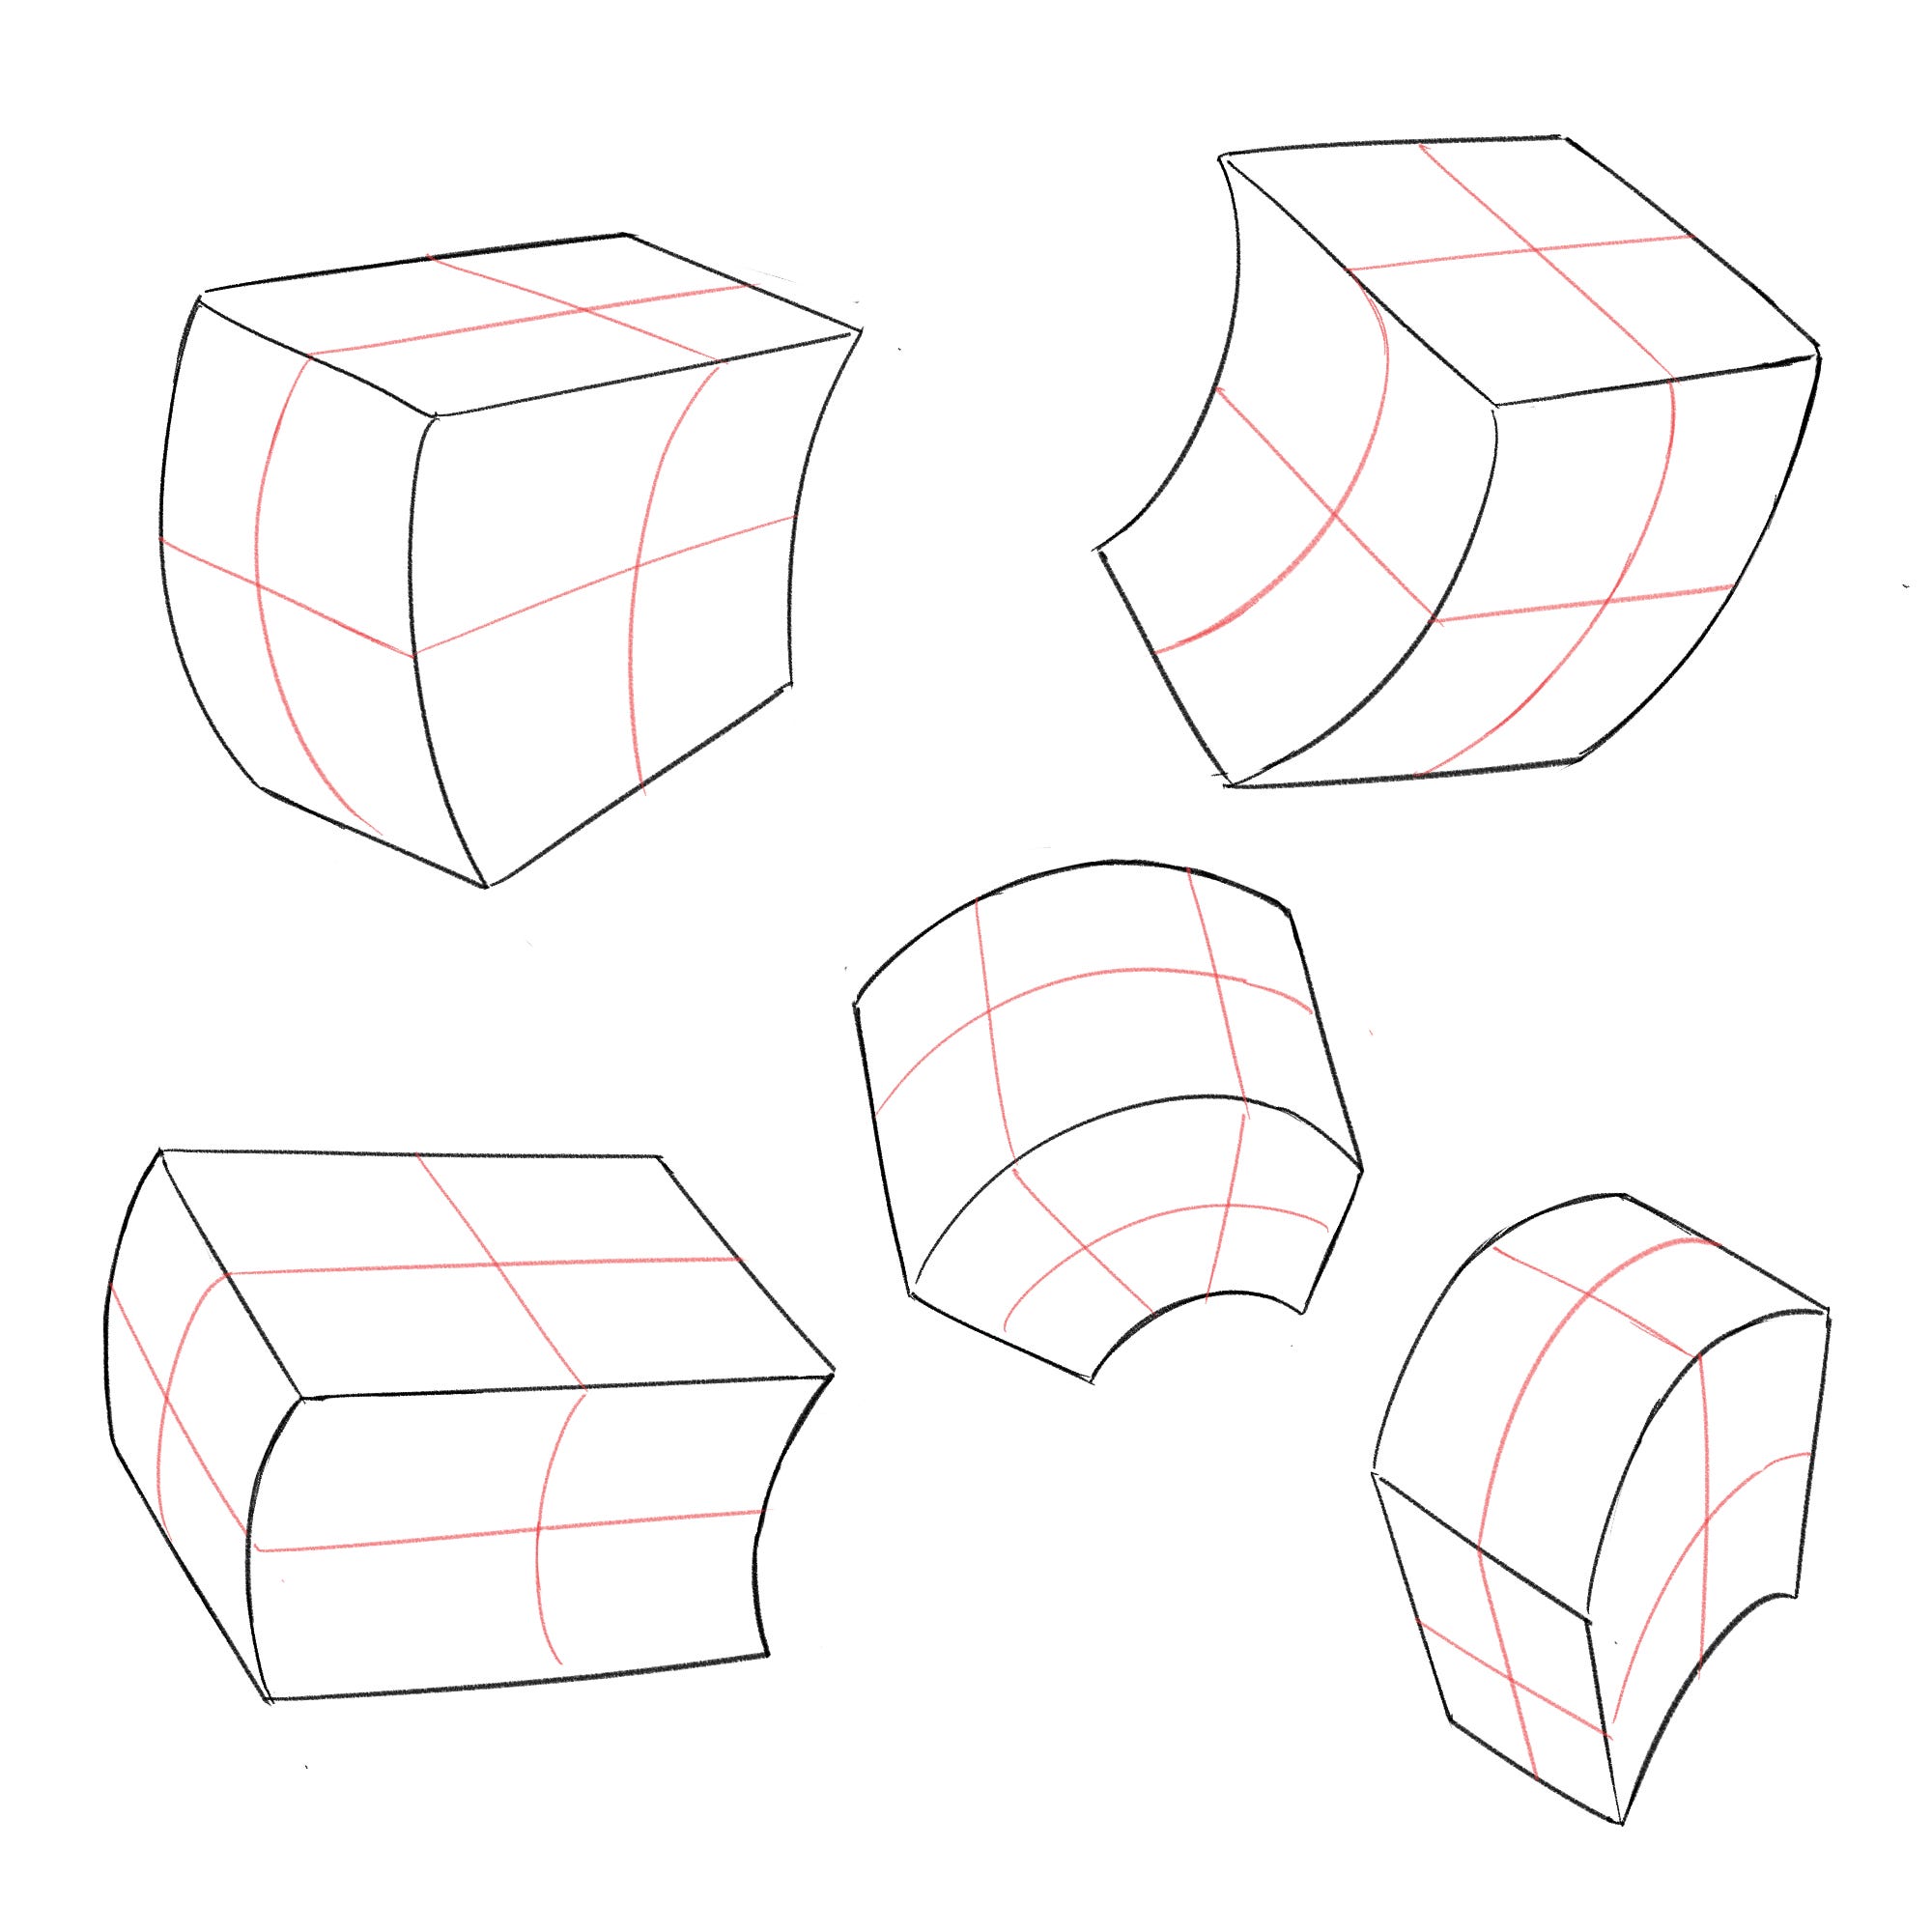
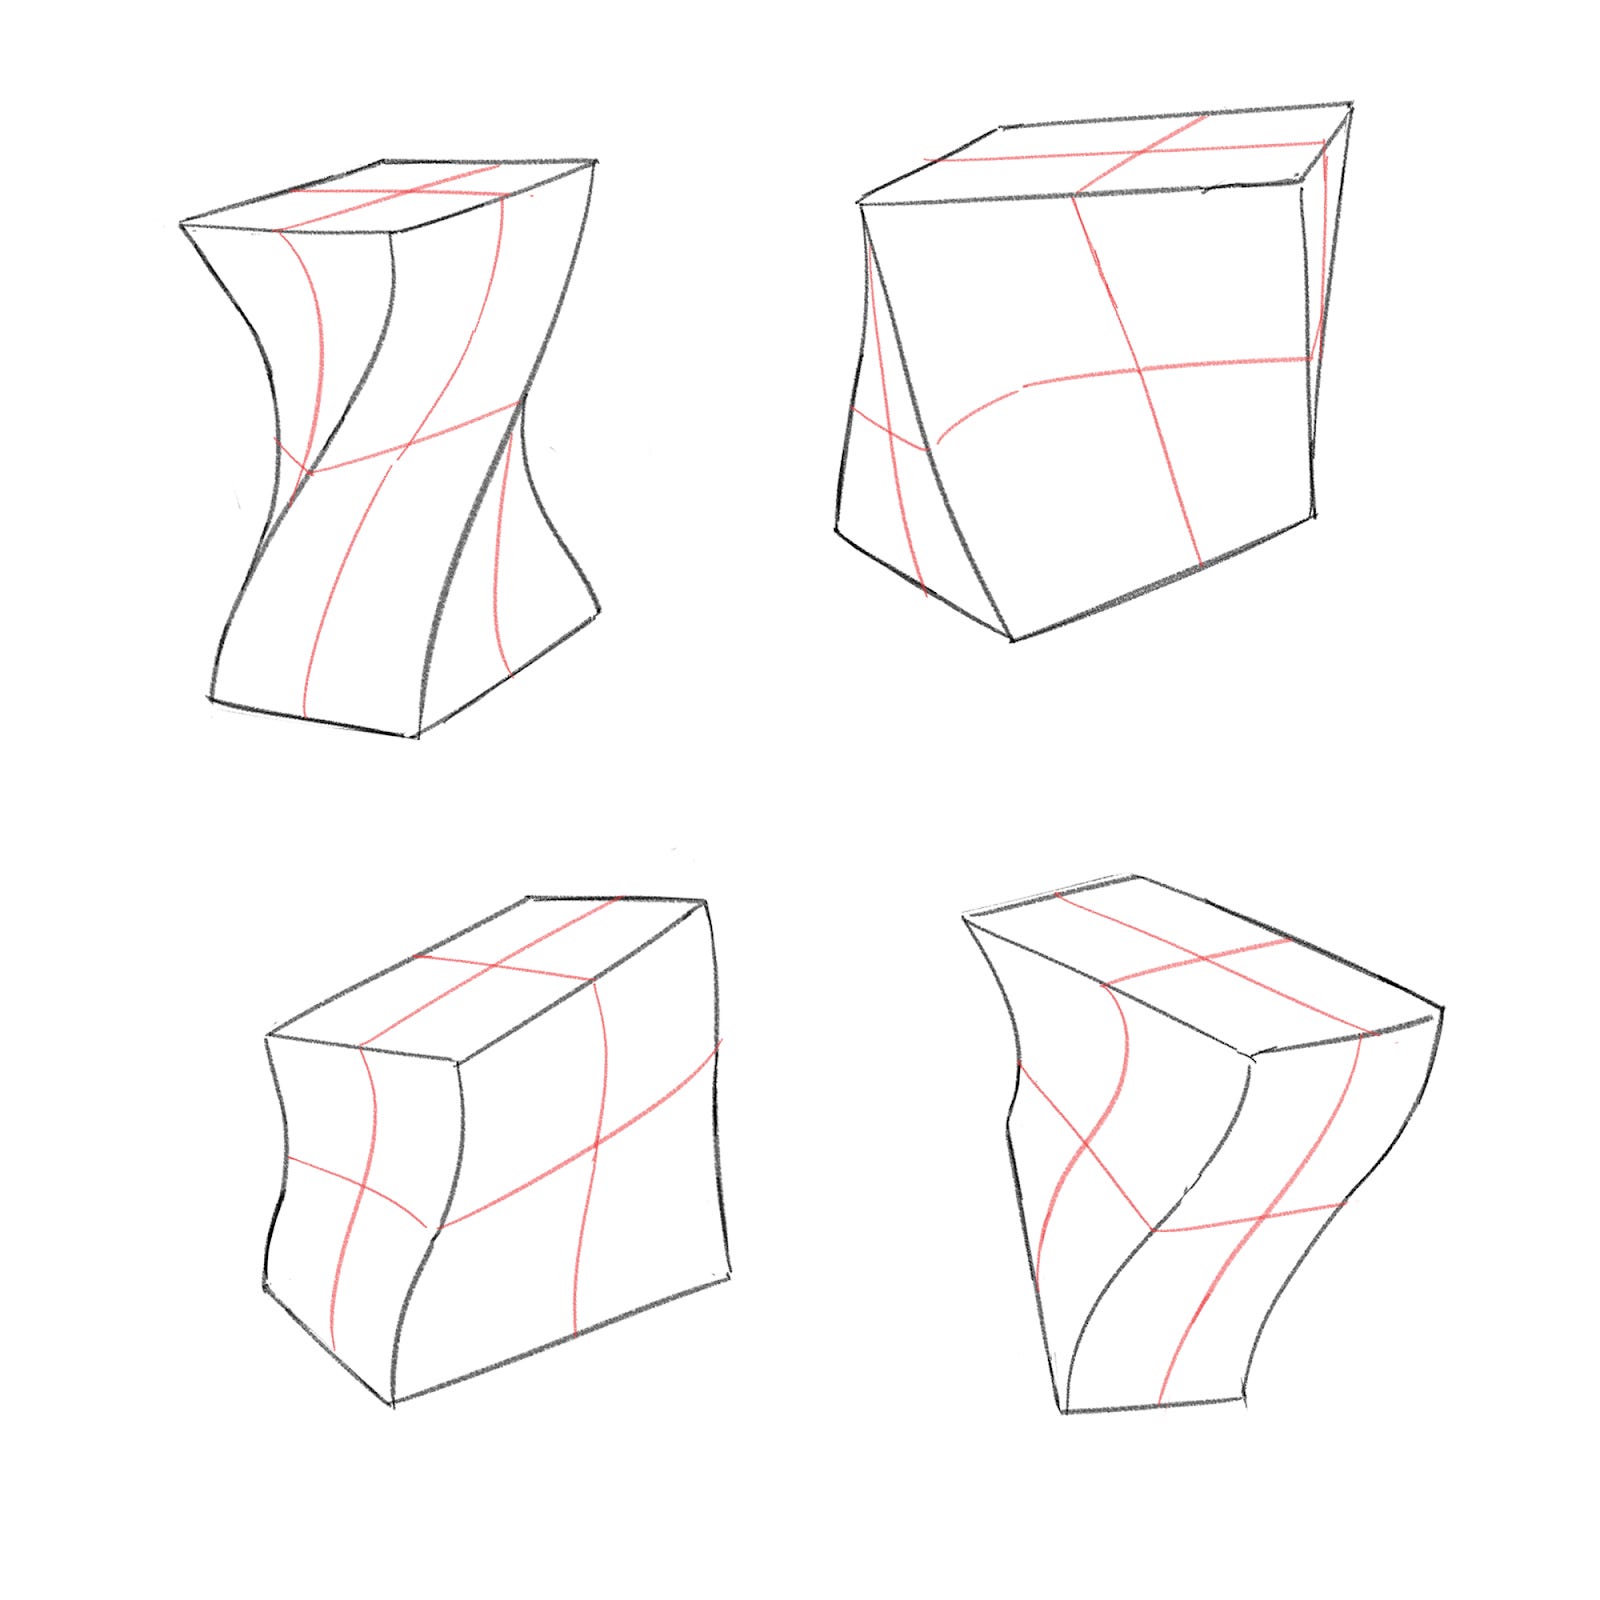
#3: Bending and twisting shapes
Okay, maybe a piece of clay will break if you bend or twist it.
These shapes can be imagined as blocks of foam or soft rubber, as they stay intact when you bend or twist them. You can see that the contour lines also curve to match the shape of these boxes:
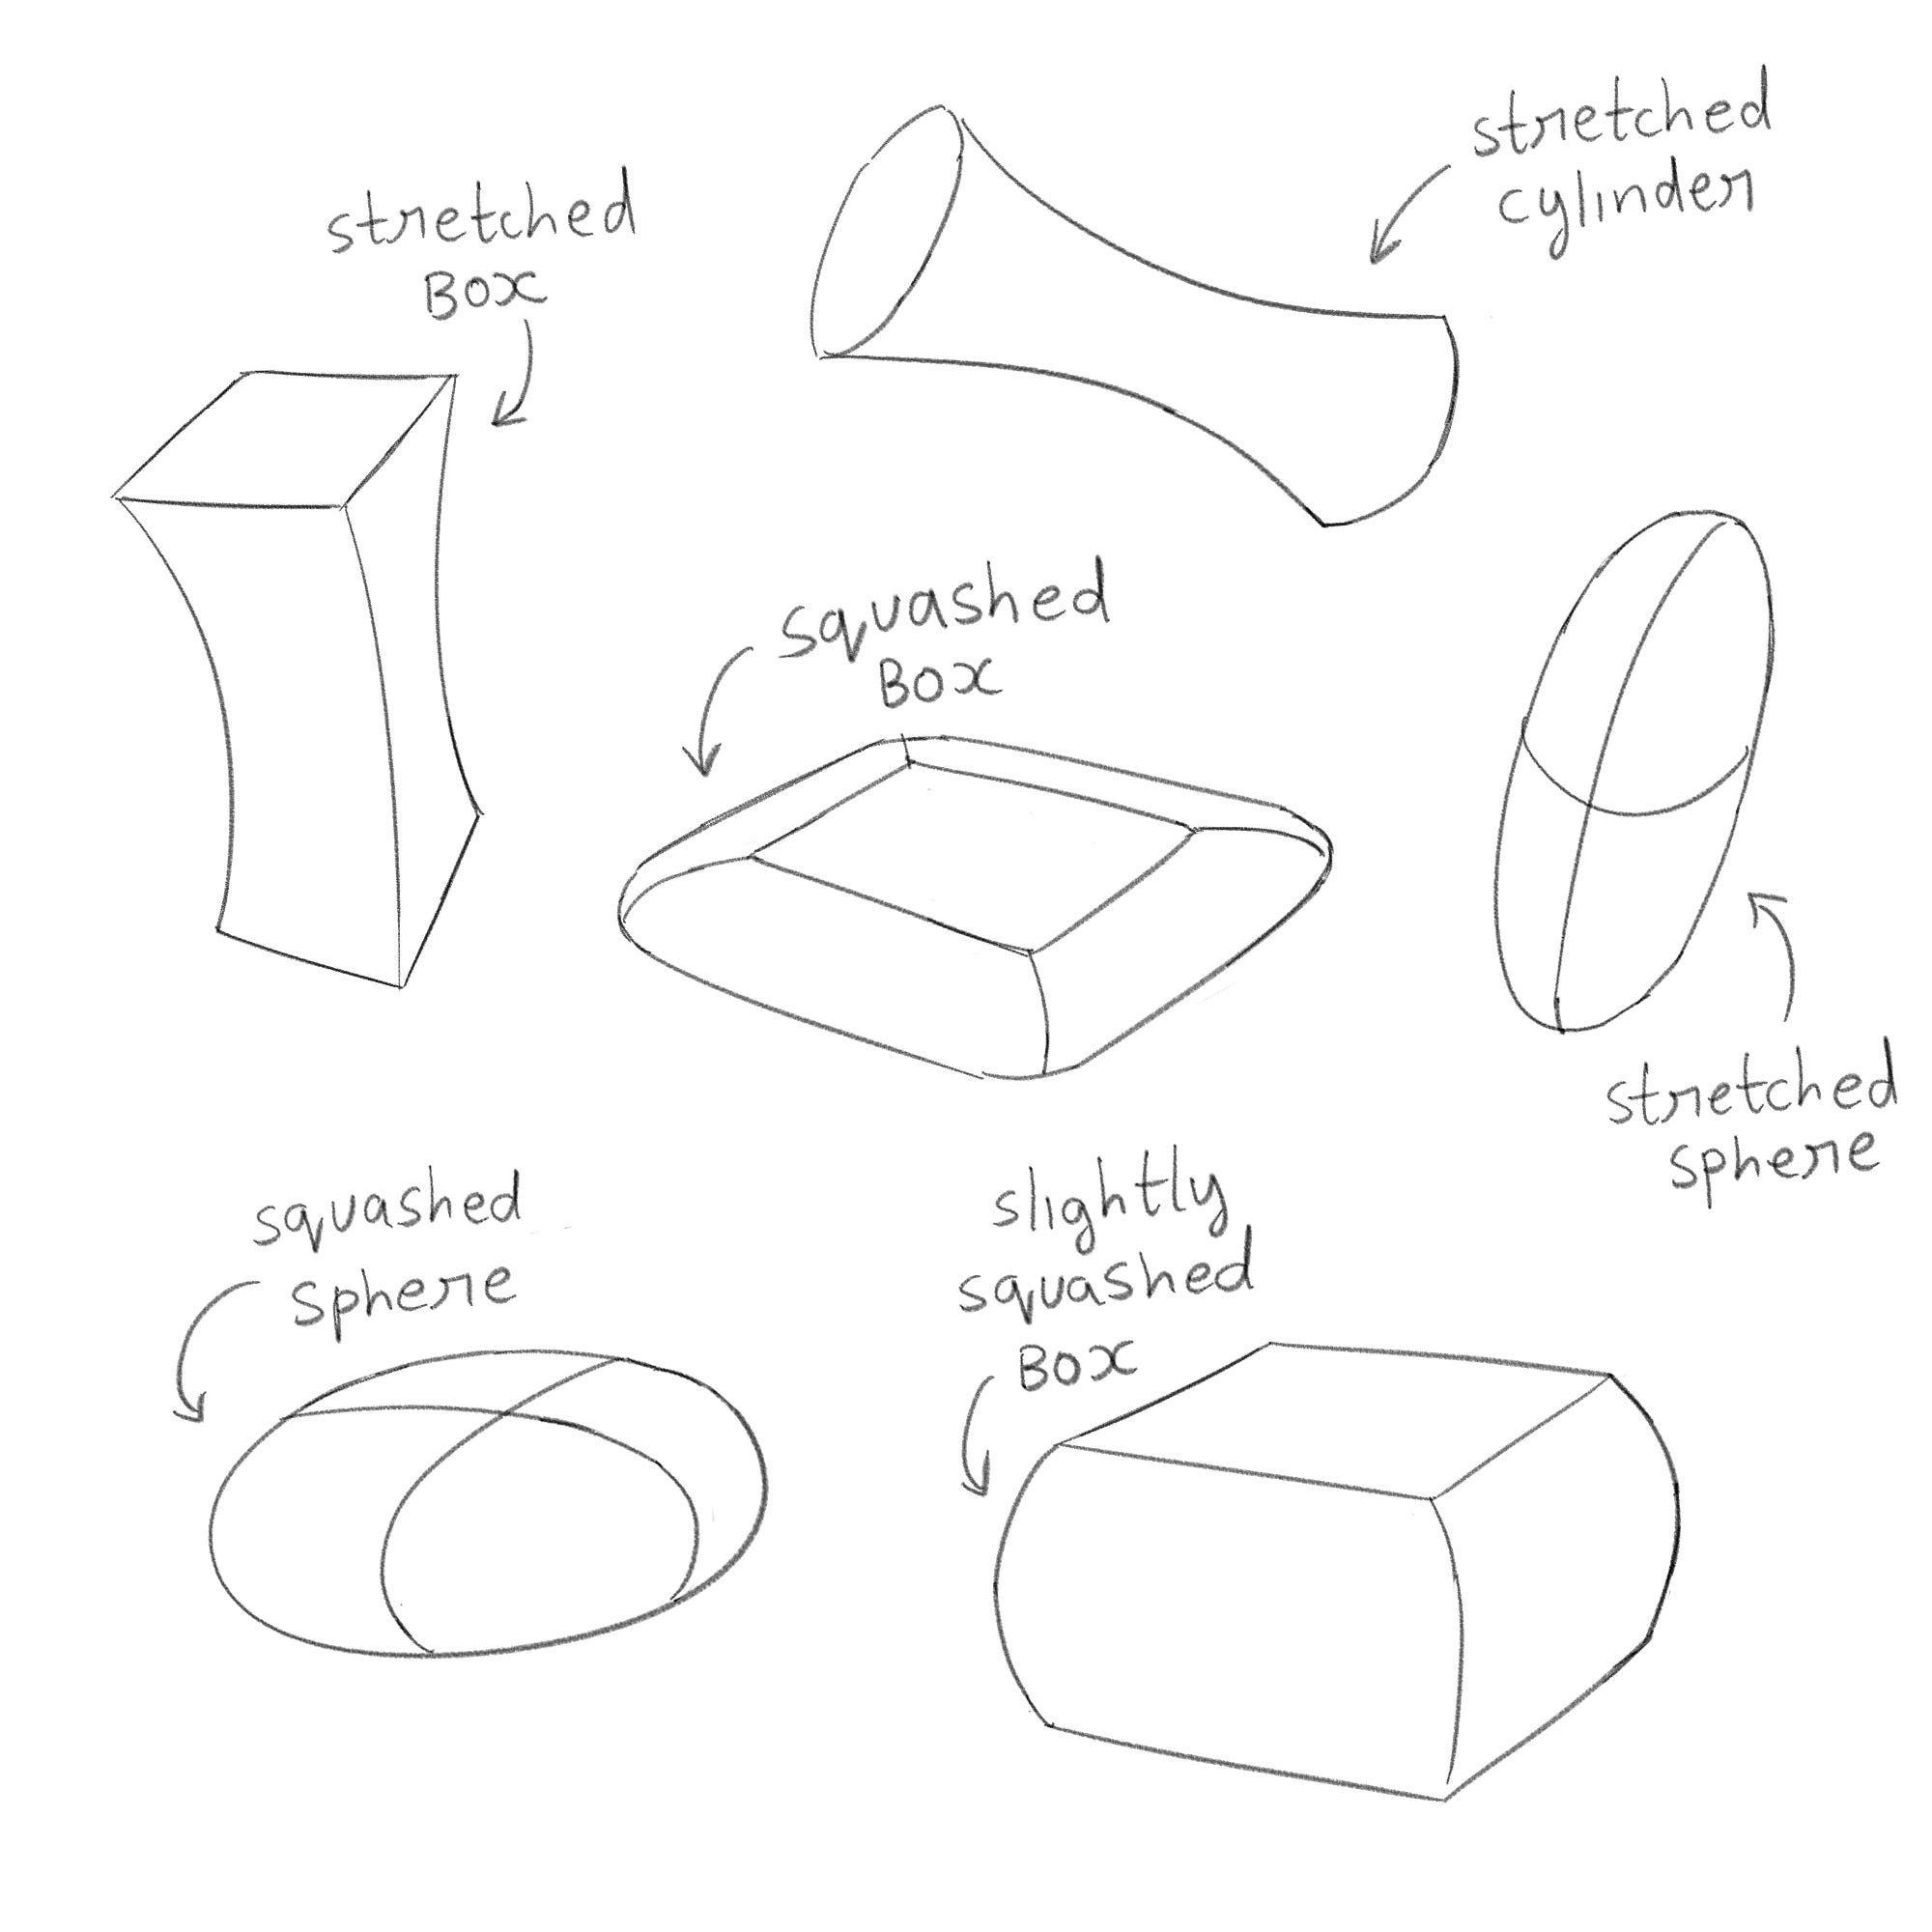
#4: Squashing and stretching shapes
Squashing a sphere feels like squashing a water balloon or a sponge ball. I would say that silicone feels like a good material to draw squashed or stretched shapes and objects.
#5: Joining and merging shapes
Joining two shapes feels like you're glueing together two objects. Merging two shapes requires you to overlap them.
Tip: You can also round the corners or sides of rigid shapes or objects when needed.
Usually, you find that desks, laptops, and dinner tables have slightly rounded edges.
In the next part, we will learn how to construct objects (like in the video you see below), using the shapes and techniques we learned so far. So stay tuned!
(Side note: I drew all the shapes without using rulers or guidelines. I made some of the lines too straight, because perfectionism kicked in. No need to draw them perfectly, just try to get the overall 3D shape right, and that's enough.)
Thank you for reading! I hope you liked reading this article, and I hope it was helpful. Come again next week on Friday for a ✨new post✨
- Harshini
The cube shaped pillow had me chuckle ^^ I will practice this tomorrow as a warm up !